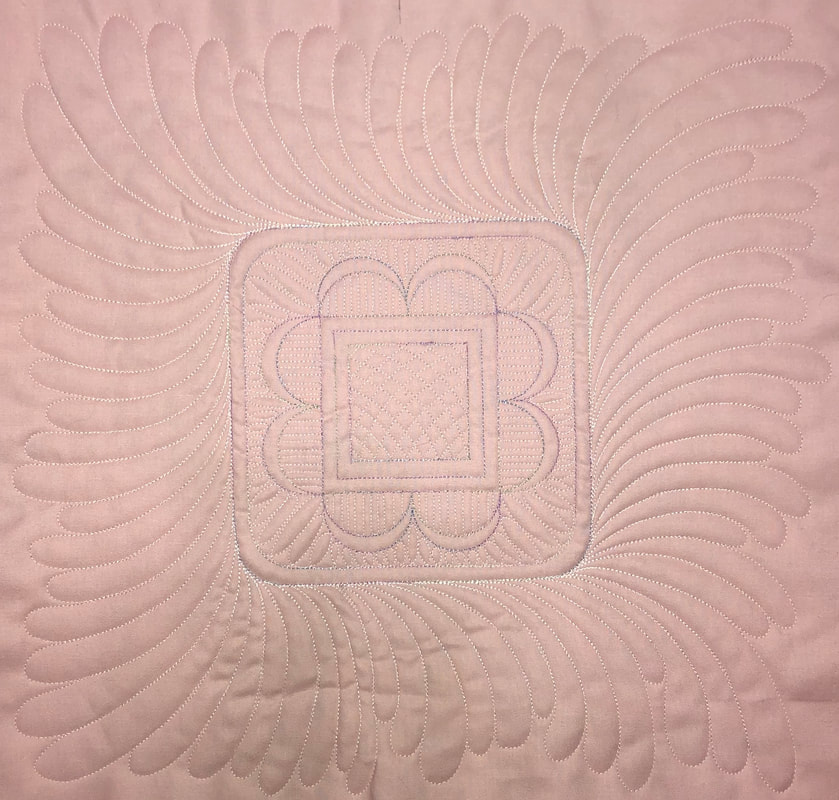
Ruler Work on your Domestic Machine is FUN and DOABLE!!! In this Ruler Work class we start at the very beginning and learn all the basics of Ruler Work on a Domestic Machine. Nina has designed a Ruler just for this class with 4 different shapes on it (this is in your class kit). Everything you learn in this class applies to all other Rulers as well. You will LOVE how Ruler Work goes hand in hand with your free motion quilting!
Supply List
*Marking tool - one that will show up on your fabric and disappear (ex. Frixion Pen, blue water soluble )
* Thread snippers
*3 Fat quarter sandwiches – fabric, batting, and back. Basted and ready to go.
*Quilting gloves - (If you have them) (There will be Machingers for sale in class $9)
*Paper and Pencil! - Letter size please
Prepare Before Class
Only do this on ONE Fat Quarter sandwich
Fabrics:
Fat Quarter solid fabric
Fat Quarter batting
Fat Quarter backing
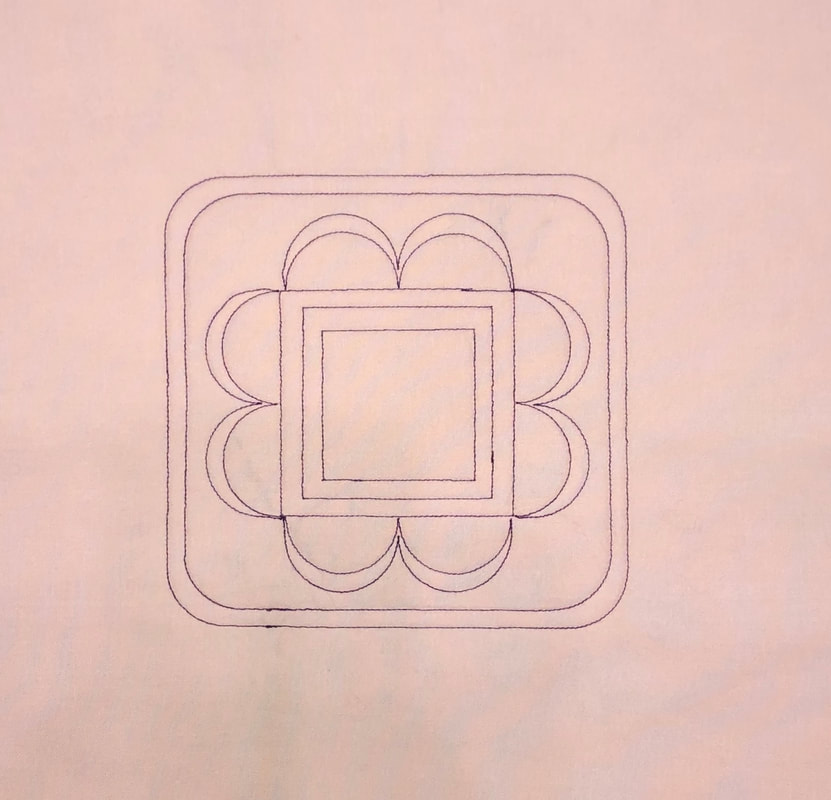
Before making your quilt sandwich we need to mark the Top Solid Fabric as follows:
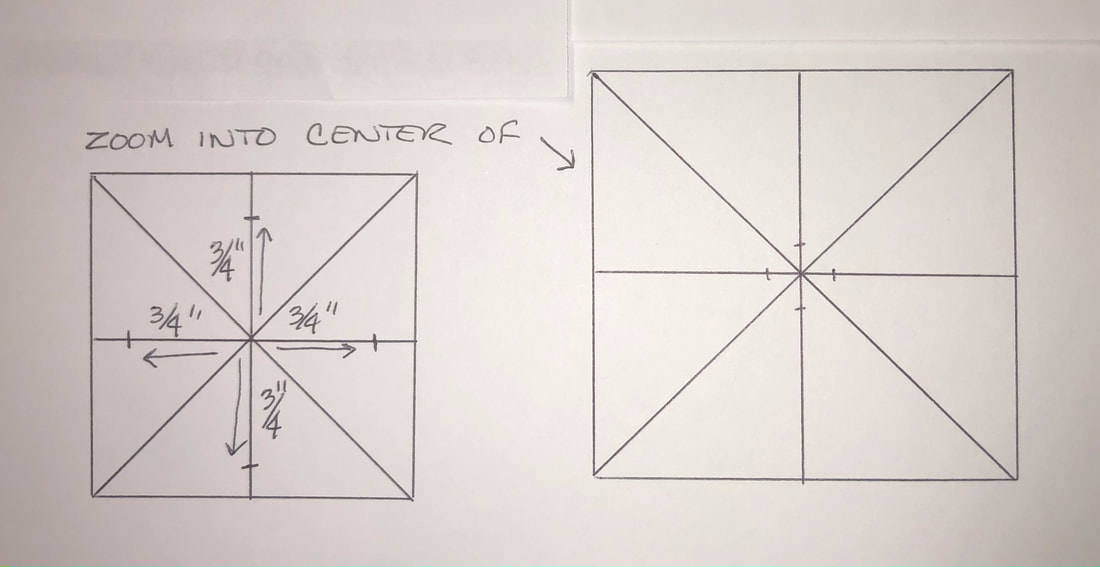
Using a ruler, draw a 14" square.
Draw a line across the square from the top left corner to bottom right corner.
Do the same from the top right corner to the bottom left corner.
You will now have an “X”
Now draw a Horizontal and a Vertical line going through the center of the “X”.
Now you have an “X” and a “+”.
Next, make a small mark 3/4” from the center on each of the horizontal and vertical lines.
Optional Supply Kit coming soon!
I know when you're travleing to a show there's a lot of things to prep.
I will have a supply kit available for purchase in July with the FQ sandwiches you'll need for class so you don't have to do them.
If you purchase this option, this will be waiting for you in class.
Check back in July
I know when you're travleing to a show there's a lot of things to prep.
I will have a supply kit available for purchase in July with the FQ sandwiches you'll need for class so you don't have to do them.
If you purchase this option, this will be waiting for you in class.
Check back in July